As some of you might know there is a build in web server in V-Control that lets one create graphical user interfaces for V-Control. But to do this, HTML and JavaScript knowledge is necessary. In this article, I will describe a simple solution using an Android device, a cheap Bluetooth serial port and a V-IO interface. The V-IO is not really necessary, a simple Arduino Uno is sufficient, but with V-IO we also have a housing for the Arduino.If you have an Android phone, all you need to build your own interfaces is
- An Arduino or Genuido Uno ( 20 EUR) or a V-IO (145 EUR)
- A Bluetooth serial module (google for HC-05 Bluetooth and you will find a huge offer of modules between 5 and 10 EUR)
- The Remotexy App (4,25 EUR. There is a free version, but this runs only 30 seconds. You can try this but if your setup works you need to switch to the paid version to work with it)
 So in total you need to invest 30 – 35 EUR.
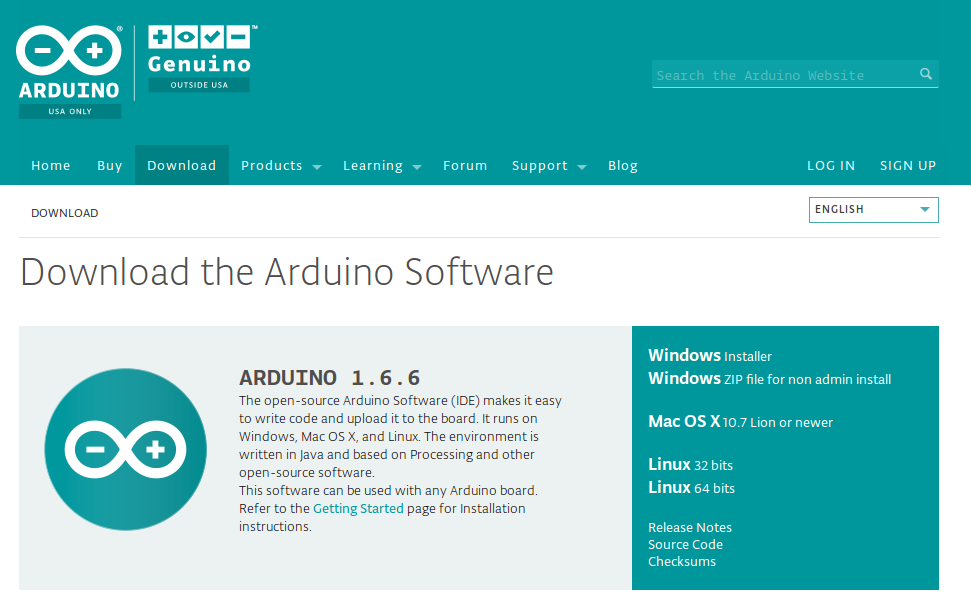
If you have all the items listed above, start with downloading the Arduino IDE from Arduino.cc for your operating system. I choose Linux 64 Bit for my System here. If you are on windows, you have the choice of downloading an installer or a zip archive. The installer has the benefit that it also installs the Arduino drivers for Windows. This step is not necessary for Linux and Mac OS because they already have the Arduino drivers.
Extract the downloaded archive. You can now start the Arduino IDE. The Linux download contains an install.sh. If you make this executable and run it, it installs an Arduino icon on your desktop (if you use Gnome 3 then you get an error message, but don’t worry, you will find the Arduino IDE in your Apps.
Now Start the Arduino IDE and see if it works. Next connect the Arduino / Genuino Uno or the V-IO via USB to your computer. Open one of the Basic Example Sketches (File -> Examples -> 01.Basics). Next you have to tell the IDE what Arduino board you are using and which serial port is used. Select Tools -> Board and select “Arduino/Genuido Uno” or whatever you are using. Now go to Tools->Port and select the serial port (dev/tty/ACM0 in a Linux / MAC environment, COMx in a Windows environment). Depending on your Linux system it might be necessary that you are in the group dialout and / or fax to have the permission to access the serial port. Push the Upload Button ![]()
The Sketch compiles now and is uploaded to your Arduino. OK, now we know that your environment is working.
Connect the HC-05 Bluetooth Adapter with Arduino

| Arduino UNO |
HC-05 |
| Digital 3 (will be configured as Send / TXD later) | RXD (Receive) |
| Digital 5 (wil be configured as Receive / RXD later) | TXD (Send) |
| GND | GND |
| +5V | VCC |
Connect the HC-05 Bluetooth Adapter with V-IO
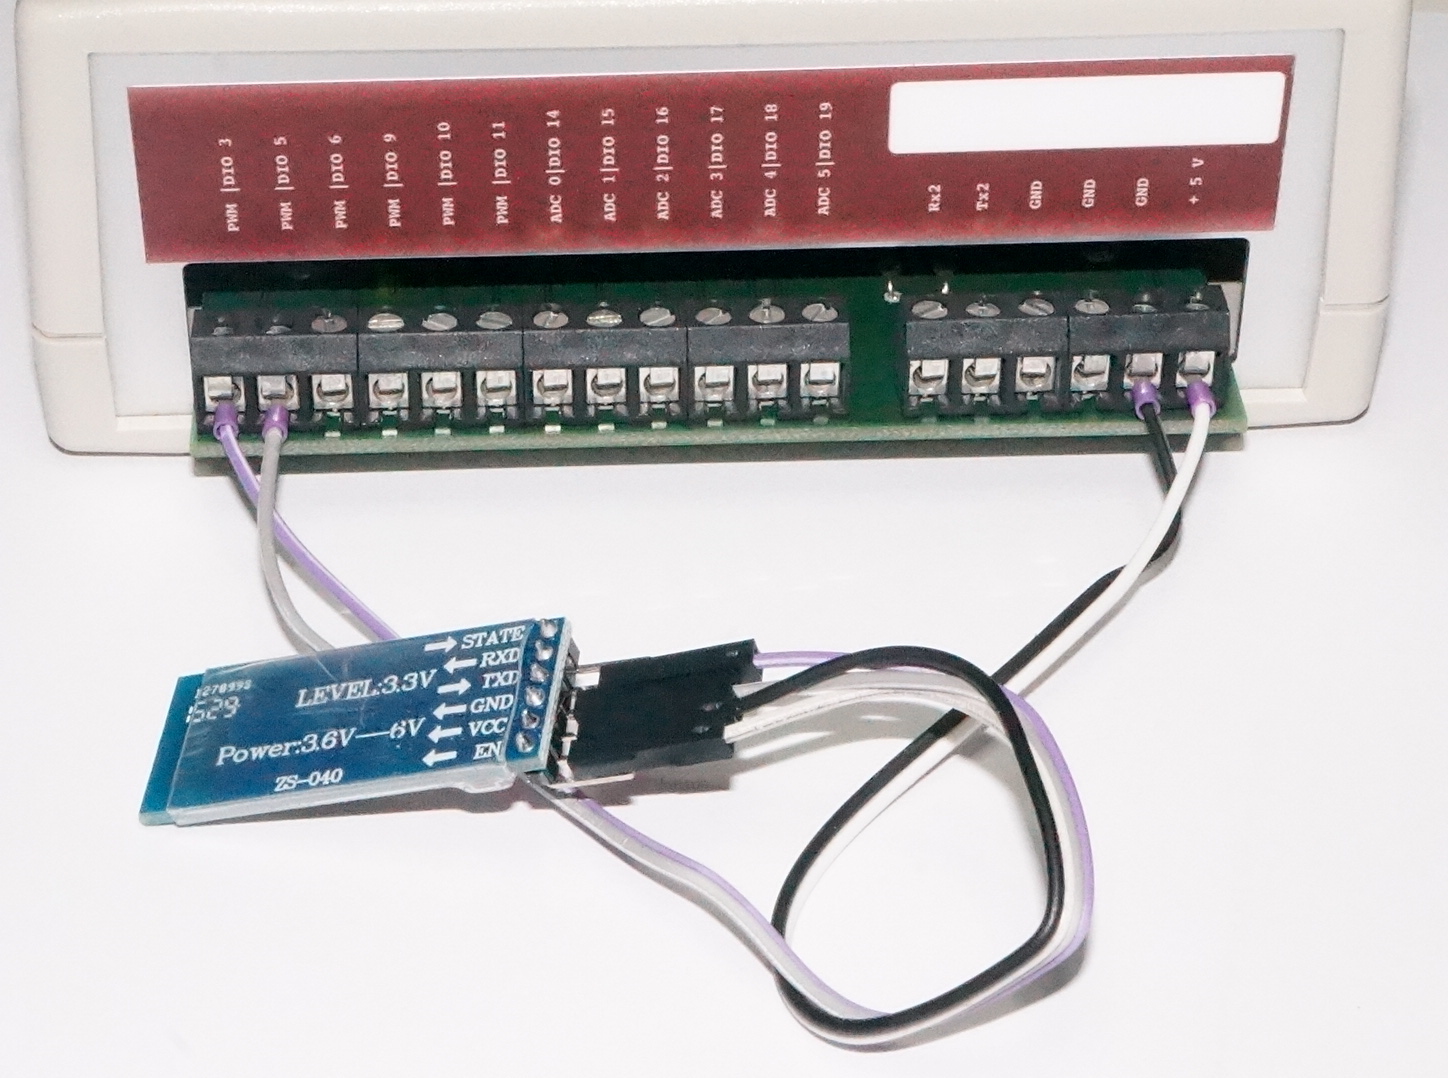
The connection here is pretty much the same. DIO3 is connected to RXD, DIO5 connects to TXD, +5V connects to VCC. And of course GND is connected to GND.
Installing the RemoteXY Library
Visit http://remotexy.com/en/library/ and download the latest version. Install the library following this instructions http://remotexy.com/en/help/how-install-library/. I repeat these steps here in a short version:
- Download the library
- Start the Arduino IDE
- Select Scetch->Include Library->Add .ZIP Library
- Select the RemoteXY.zip file previously downloaded.
Creating the GUI
The hardware setup is done. Now lets start creating the first GUI. Open a browser and visit http://remotexy.com.
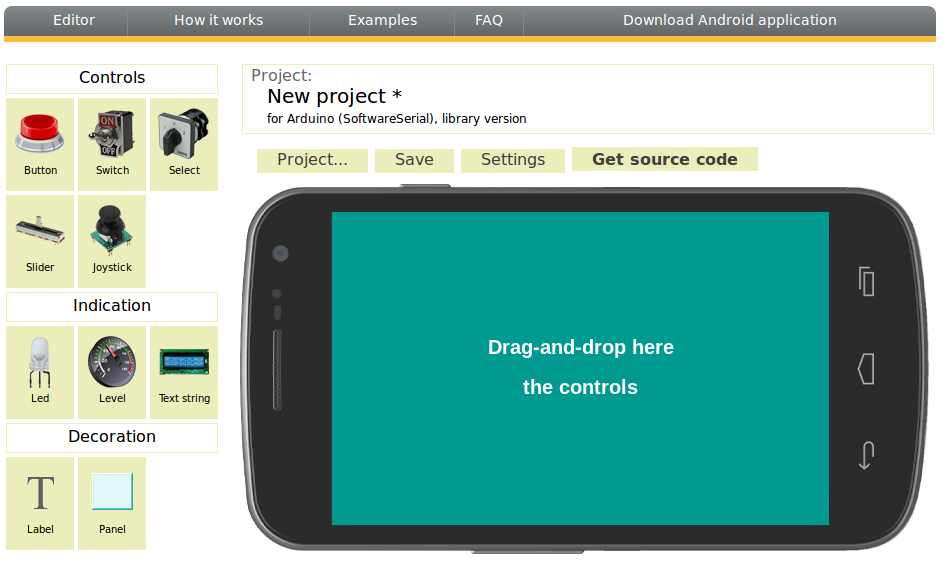
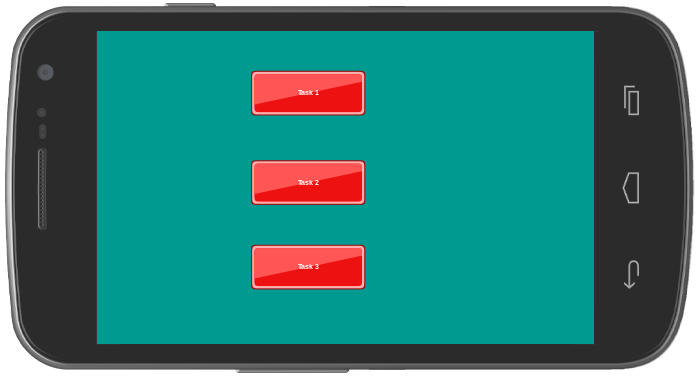
We start with a very simple project. Lets assume we want to start three V-Control tasks named Task1, Task2 and Task3. We need to drag three buttons to the surface. Select a button and right click to open the buttons properties.
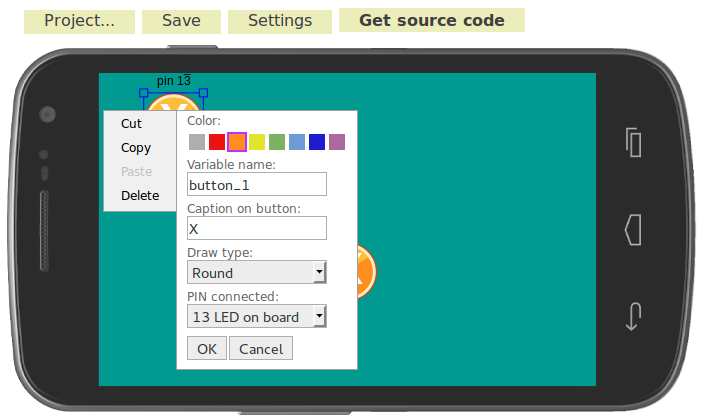
We change the Variable name to task_1 and the Caption to Task 1. As Draw type I choose Rectangular. In the Combo box PIN connected we select no connect. As color I choose red. Click OK and proceed with the other two buttons in the same way (Variable name = task_2, task_3. Caption = Task 2, Task 3 etc.). Finally the result looks like this:
Now we click Get source code, select and copy the source code. Start the Arduino IDE and create a new project (File->New). Delete the automatically created source skeleton and paste the code from RemoteXY in the editor. Next we have to change the code a little bit. The code from RemoteXY assumes that TXD is connected to port 2, but I use port 5 in this example. So we need to change the line
#define REMOTEXY_SERIAL_RX 2
to
#define REMOTEXY_SERIAL_RX 5

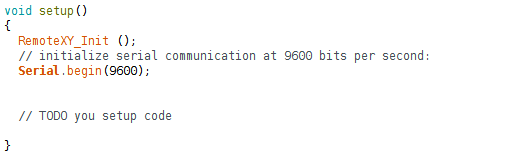
The communication from Arduino to V-Control is also done via RS232 (USB Serial Port emulation). So we have to set up a second serial connection. The serial connection from Arduino to HC-05 uses software serial, meaning that we use two non UART pins (Digital3 and Digital 5 in this case) and run the serial commands through these pins using a serial emulation. For the communication with V-Control we use UART (hardware) serial. This is the serial connection we have if we use the USB connector. To set this connection we have to add the line
Serial.begin(9600)
in the setup function.
Now we are almost done. What is missing until now is to define the action that happens if the user presses one of the buttons. Well, we want to call a task in V-Control, so we have to implement the V-Control Remote Service protocol here. A Command to V-Control always starts with a binary 4, followed by an ASCII character (0 for commands) and a binary 5. Then the command is added and separated by a binary 5 with the parameter. After the parameter the string is terminated with a binary 6. The code to call a task with the name Task1 is here.
Serial.write(4);
Serial.print("0");
Serial.write(5);
Serial.print("scrRunTask");
Serial.write(5);
Serial.print("Task1");
Serial.write(6);
delay(500);
The button action is performed as long as the button is pressed. If you touch and hold the button, the scrRunTask command is executed again and again. To prevent flooding V-Control with messages, I put a small delay after the command (500 ms).
The final sketch looks like this:
/////////////////////////////////////////////
//        RemoteXY include library         //
//   use ANDROID app version 3.2.1 or up   //
/////////////////////////////////////////////

/* RemoteXY select connection mode and include library */
#define REMOTEXY_MODE__SOFTWARESERIAL
#include <SoftwareSerial.h>
#include <RemoteXY.h>

/* RemoteXY connection settings */
#define REMOTEXY_SERIAL_RX 5
#define REMOTEXY_SERIAL_TX 3
#define REMOTEXY_SERIAL_SPEED 9600

/* RemoteXY configurate  */
unsigned char RemoteXY_CONF[] =
{ 3, 0, 44, 0, 3, 5, 1, 1, 35, 8
  , 21, 10, 1, 84, 97, 115, 107, 32, 49, 0
  , 1, 1, 35, 24, 21, 10, 1, 84, 97, 115
  , 107, 32, 50, 0, 1, 1, 35, 40, 21, 10
  , 1, 84, 97, 115, 107, 32, 51, 0
};

/* this structure defines all the variables of your control interface */
struct {

  /* input variable */
  unsigned char task_1; /* =1 if button pressed, else =0 */
  unsigned char task_2; /* =1 if button pressed, else =0 */
  unsigned char task_3; /* =1 if button pressed, else =0 */

  /* other variable */
  unsigned char connect_flag;  /* =1 if wire connected, else =0 */

} RemoteXY;

/////////////////////////////////////////////
//           END RemoteXY include          //
/////////////////////////////////////////////


void setup()
{

  RemoteXY_Init ();
  // initialize serial communication at 9600 bits per second:
  Serial.begin(9600);


  // TODO you setup code

}

void loop()
{
  RemoteXY_Handler ();

  // TODO you loop code
  // use the RemoteXY structure for data transfer
  if (RemoteXY.task_1 != 0) {
    Serial.write(4);
    Serial.print("0");
    Serial.write(5);
    Serial.print("scrRunTask");
    Serial.write(5);
    Serial.print("Task1");
    Serial.write(6);
    delay(500);
  }

  if (RemoteXY.task_2 != 0) {
    Serial.write(4);
    Serial.print("0");
    Serial.write(5);
    Serial.print("scrRunTask");
    Serial.write(5);
    Serial.print("Task2");
    Serial.write(6);
    delay(500);
  }

  if (RemoteXY.task_3 != 0) {
    Serial.write(4);
    Serial.print("0");
    Serial.write(5);
    Serial.print("scrRunTask");
    Serial.write(5);
    Serial.print("Task3");
    Serial.write(6);
    delay(500);
  }
}
If you use the same pins for the serial connection to the HC-05 as in this example, you can copy the code here and replace it with your current code. If done, save the project and press the Upload button.
Installing and using the RemoteXY App
The next step is to install the RemoteXY app on your android device. You can easily find it in the Play Store. Once installed, enable Bluetooth. Open the App and click the Bluetooth button. Click the button on the top right corner to scan for Bluetooth devices. You should see your HC-05 adapter in the list. Select it to continue.
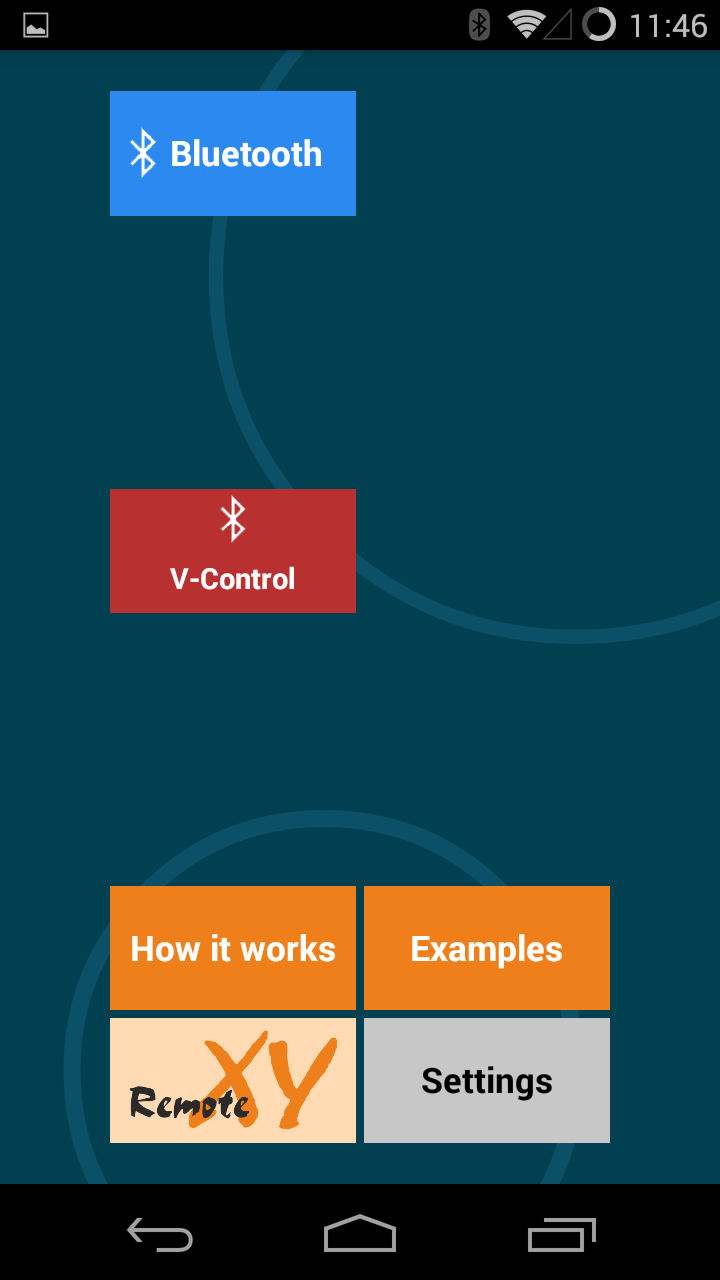
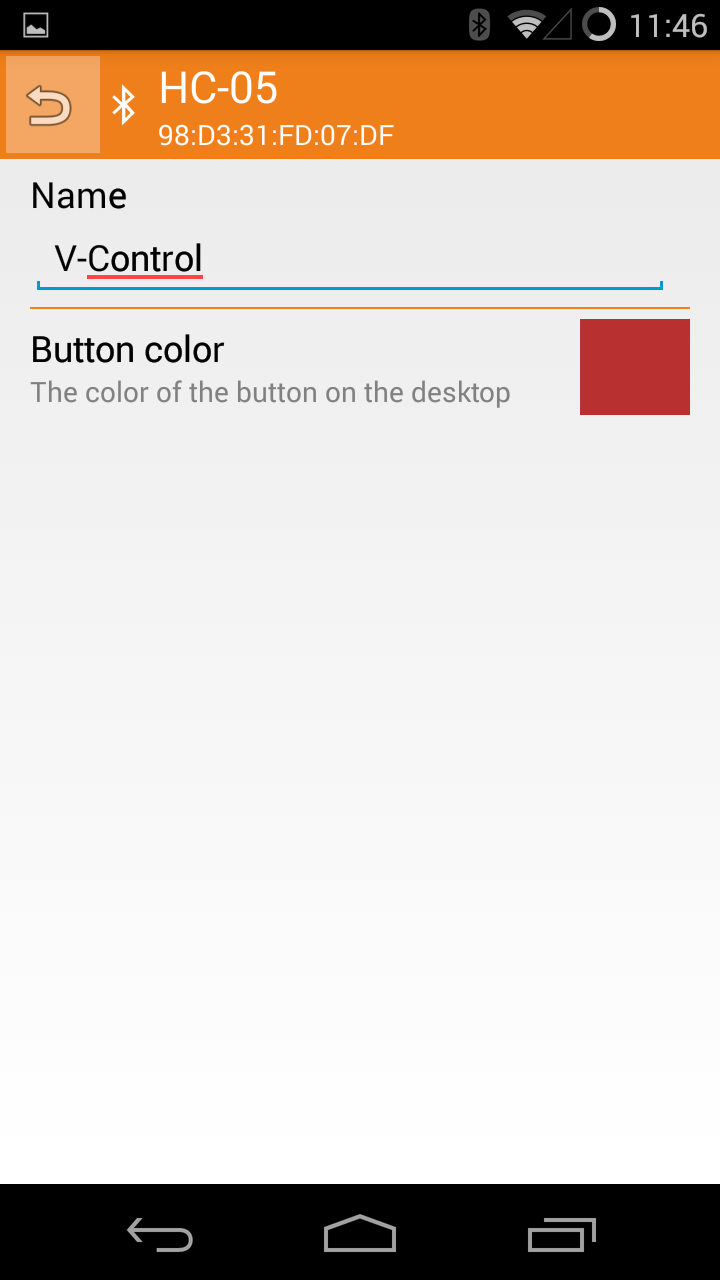
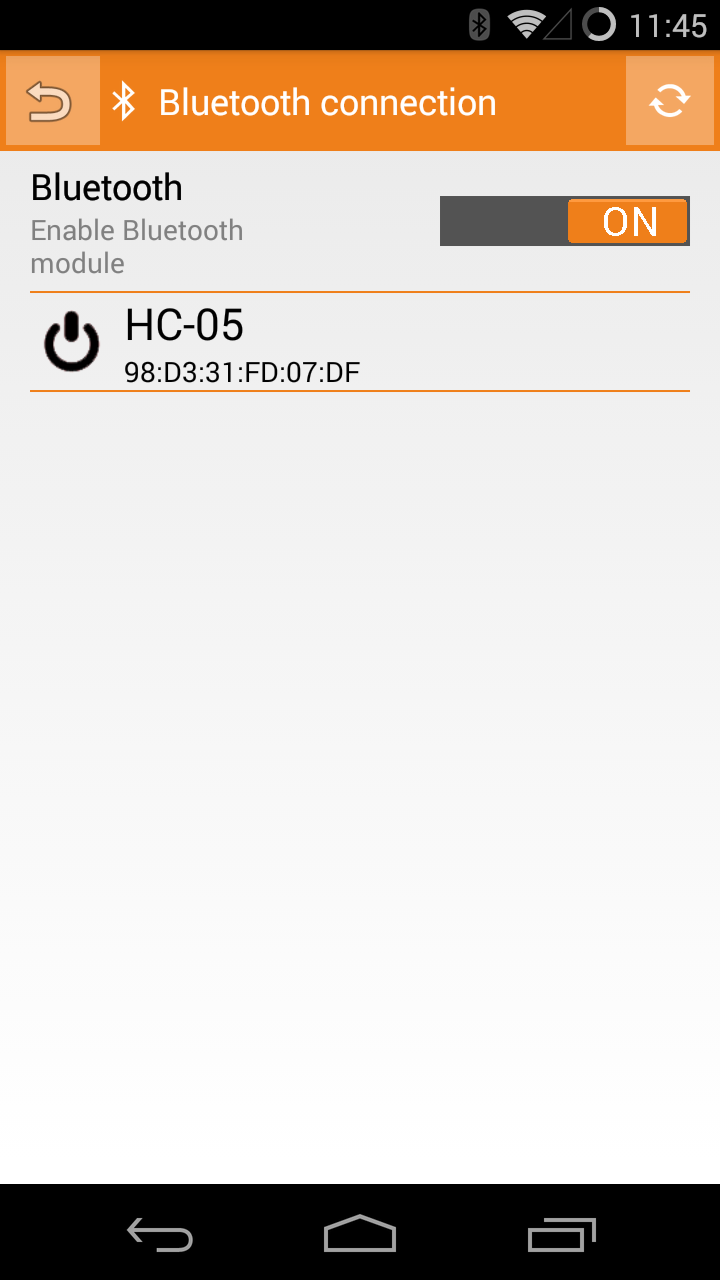
Back on the main screen you can edit the HC-05 adapter button by long pressing it. You can then change the name and color.
If finished you can click on the button (the red V-Control button in my case) and voilà:

Here is our first GUI. But there is still one final step to do. Now we need to create the V-Control Tasks and connect the Arduino to V-Control.
Connecting the Arduino with V-Control
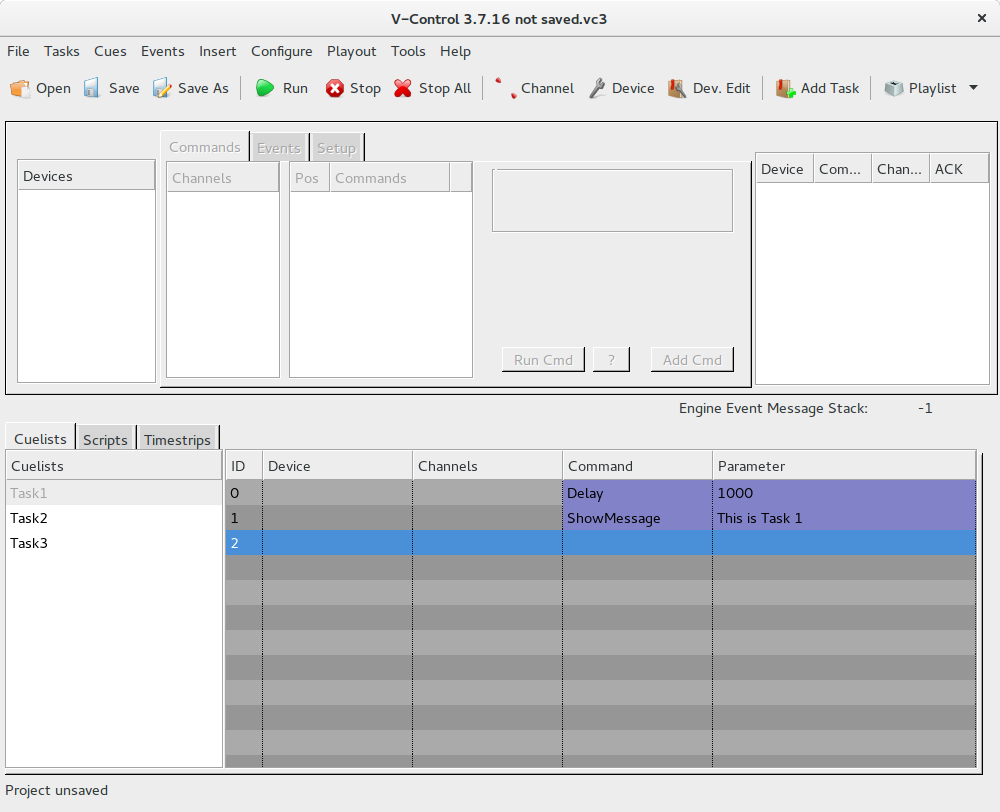
If not already done download and install V-Control. Create 3 Tasks named Task1, Task2, Task3. For demonstration we put a delay in each task and a showmessage command that shows a text message in the status bar. V-Control should now look similar to this:
Now we have to configure V-Controls remote Service. Click Configure->Options and switch to the Remote Services tab. Select the RS232 tab here. Select your Arduino device as Commport. Baudrate, Data Bits, Stop Bits and Parity stay at their default values. Check the Enable RS232 Remote Service box.
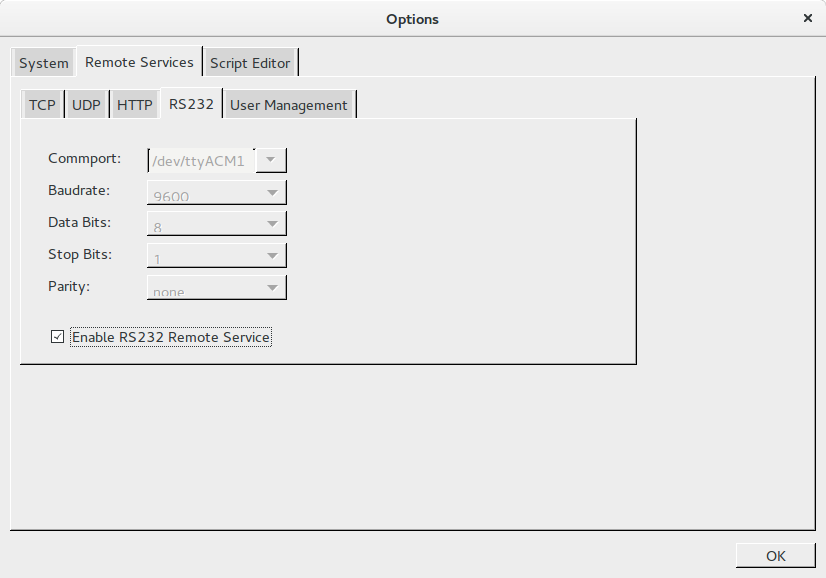
Click OK.
Now we are finished. Touch the buttons on your Android device and the task associated with that button becomes bold in the tasklist. After the delay you see the message of the task in the Status line.

This is all for the moment. I will soon start another tutorial with some more exiting GUIs using this technology.